


As a kid and even today, I have dented a lot of wooden furniture at work and at home. But never did I know removing dents from wood was so easy. I recently learned that one can steam out a dent from a piece of wooden furniture or flooring using a wet rag and an iron. And I’d like to share it with you.
To see dents on finished wooden surfaces day in and day out can be really annoying. An accidental dent may be the only defect on your coffee table, dining table, work station or may be the floor and an effort to sand the entire surface to remove the dent may sound too time consuming and expensive.
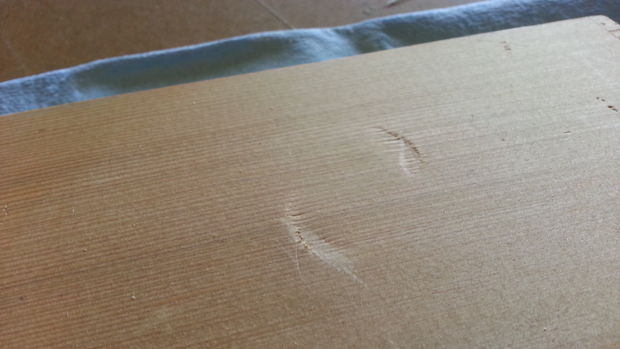
Here we will discuss a way, so you don’t have to live with the annoying wooden surfaces without using wood filler or having to spend even a penny. You can simply carry out a little processes of removing the dent(s) by swelling the wood fiber with water and heat. The technique works with all kinds of wooden floors and tables.
Things you will require:
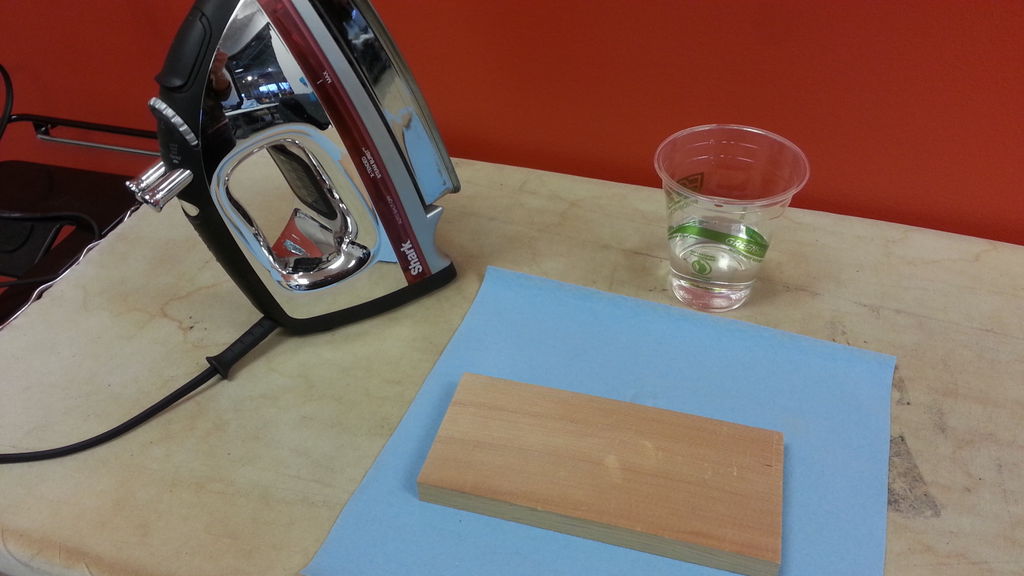
Since the process is simple, you don’t have to break your wallet. The trick only requires you to assemble:
- An iron, which will be required to steam the dent
- A paper towel or an or rag, which will be used to assist in steaming the dent
- Water
Step 1: Process to steam the wood:
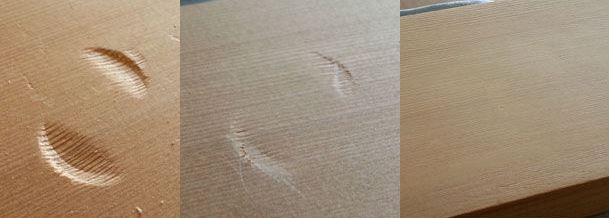
Begin by putting some water on the affected area. Do not use too much water, just enough to cover the dent. Cover the water with a rag or paper towel. You can use anything because the idea is to allow water to wick through the fabric.
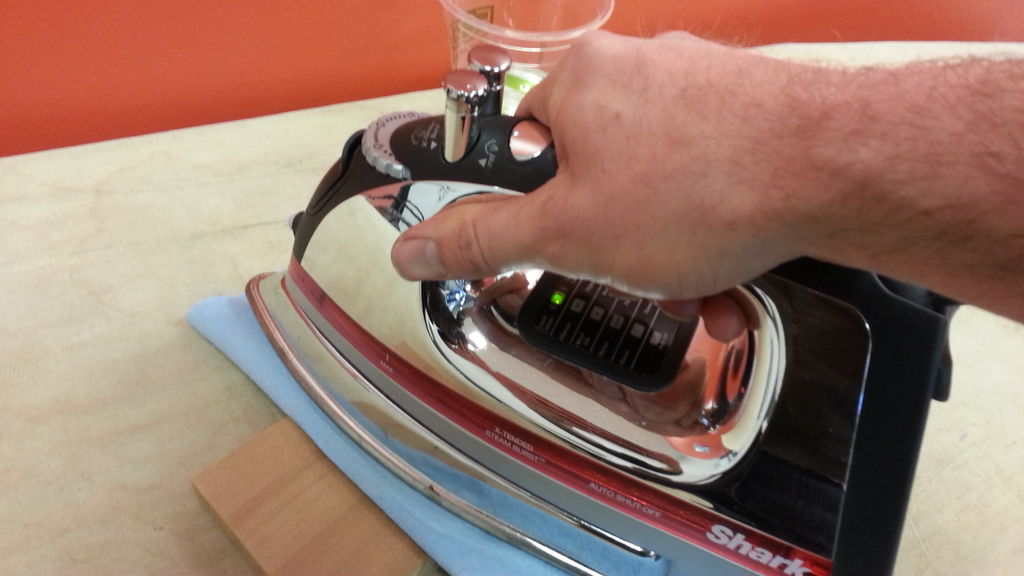
Now, is the most critical aspect! Take an iron on its highest setting, and hold it carefully over the cloth placed on the affected area (make sure you do not touch the iron on other parts of the wooden surface as it may affect the surface). By placing the iron carefully on the affected area, make small movements in circles or back and forth. Apply pressure on the iron – press it down firmly and hold it in place until the cloth is completely dry. It won’t take more than a few seconds though.
In the process, the wood fibers have been absorbing the water and will show sighs of expanding back to their actually position (as before the dent). But in case there is still scope, you can continue the process. Add some more water on the dent, place the cloth and iron it until the dent rises up to its original self.
Step 2: Sand the surface to smoothen it:
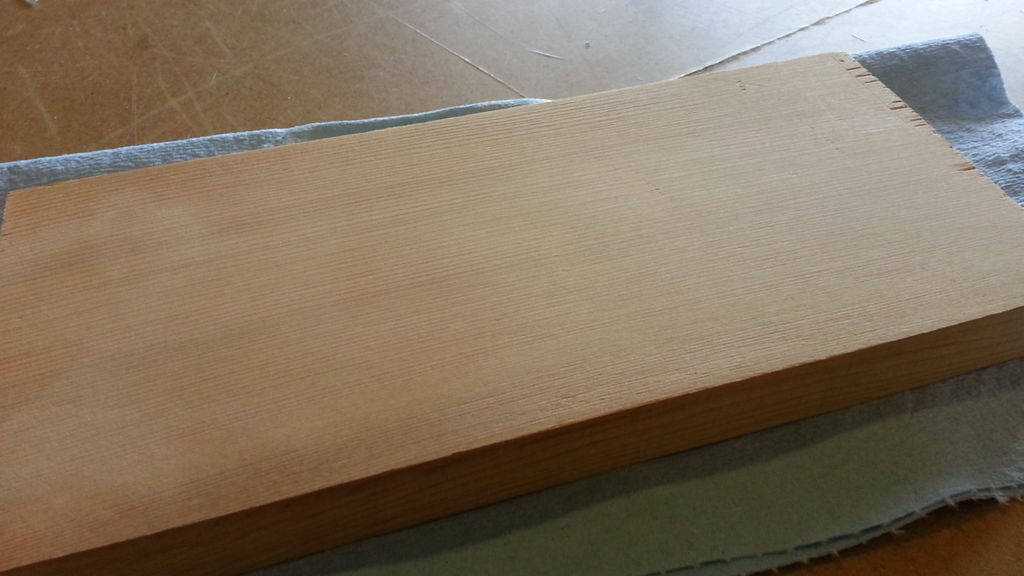
Once the dent rises up to its original self; normally the area around the dent is smooth enough. However, if the damage was intense, there are chance that the outline around the dented area isn’t as appealing as you’d want. In such condition, use sandpaper to rub the area very lightly. The process will not be very time consuming and you will be able to get a smooth looking wooden surface.
Step 3: Reseal the surface:
In some cases, the affected wooden surface could be treated with varnish. If it’s a case with you too, you will require an extra step. This to reseal the surface. If your floor or table was varnished, you will have to touch up the affected area after treatment to ensure it doesn’t look different.
So then, I can’t emphasize enough to let you know how simple and effect this process is. But be informed that this method works on normal wood and not on compressed wood surfaces.

0 Comments.