


Backsplash tiles in the kitchen not only protect your kitchen walls from stains but make them look beautiful and attractive. This article will help you to learn on how to give your kitchen a different and surprising look by installing backsplash.
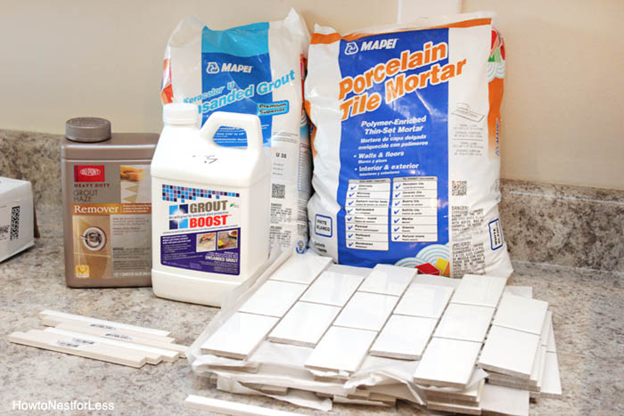
Materials and Tools Required: You will need the following material to accomplish the process.
1. Grout
2. Stylish Patterned tiles of your choice.
3. Grout Sealant/boost
4. Tile adhesive
5. Plastic tile shims
Arrange and keep handy these tools that you will need during the process:
1. Trowel
2. Wet Saw
3. Marker or pencil
4. Spacers
Installing the Backsplash Step by Step: The process of installing backsplash is as follows:
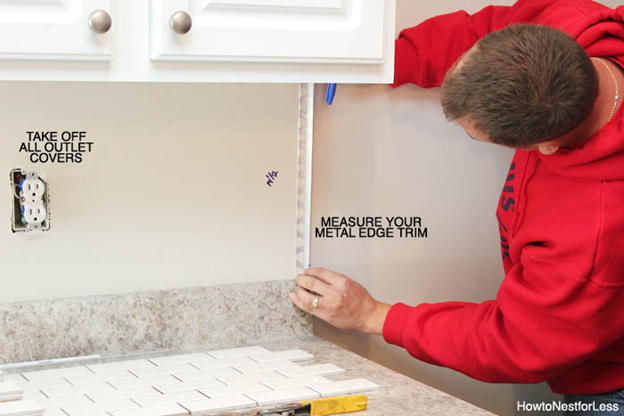
Step 1 – Prepare before you start:
You should take off all the electric outlet covers and should cover all the counters and cabinets with paper to keep them clean. Measure the space between the countertops and cabinets and trim the metal edging to fit the height. You can use a pair of strong scissors. Metal edging will give you a clean finishing.
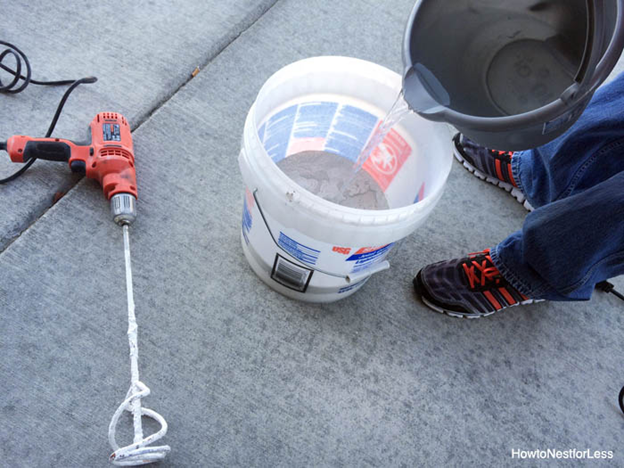
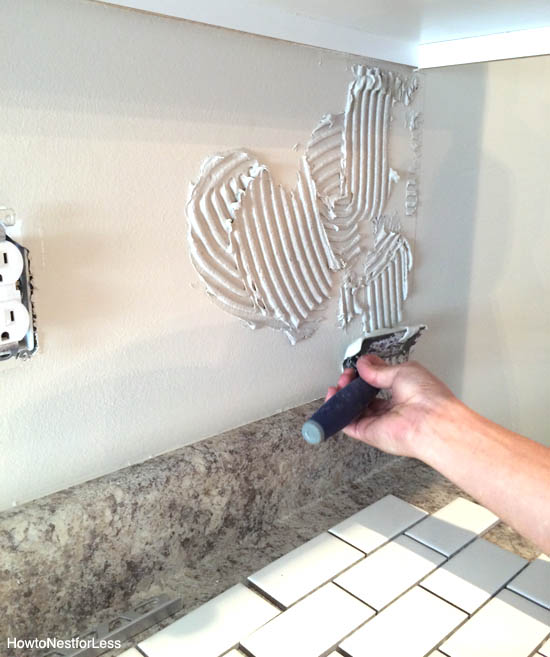
Step 2 – Preparing the mortar:
It will be beneficial for you to read and follow the instructions given on the bag of mixer. You can always consult some specialized workers to get a better guidance from them. You may use a large mixer and container like bucket to perform mixing. Do not prepare mortar mix in large quantity as it will start drying within no time. Spread the mortar on the space using an appropriate trowel.
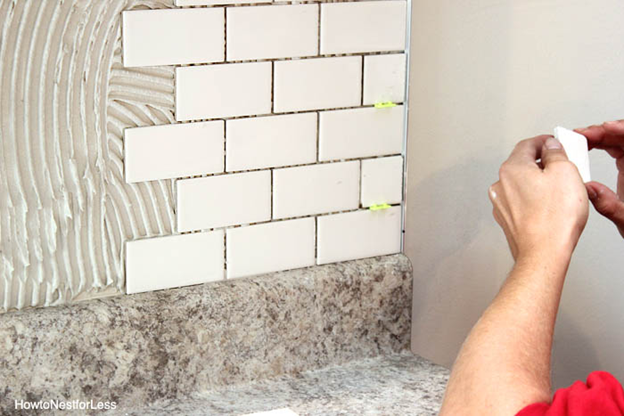
Step 3 – Laying the Tiles:
Place the metal trim on the space and press into place. Now, start laying the first set of tile to a level with the top of your countertop and level right with the metal trim.
Step 4 – Filling the Gaps:
You need to cut the tiles so as to fir them into the gaps. To make this task simpler, you may hold up a single piece of tile in place and mark the cut mark with a pencil or marker. Next, you need to cut the tiles with a wet saw and take it slow. Now place the filler pieces in the gaps and held in place with spacers. You may face difficulty while laying tiles near the outlets and corner windows. You might need to cut the tile while you need to fill the space just beneath the cabinets. Wait for a day (24 hours) for the mortar to set.
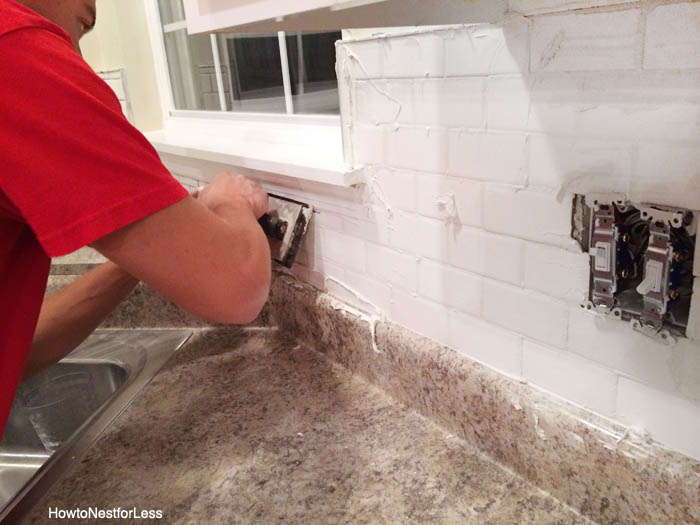
Step 5 – Grout to seal
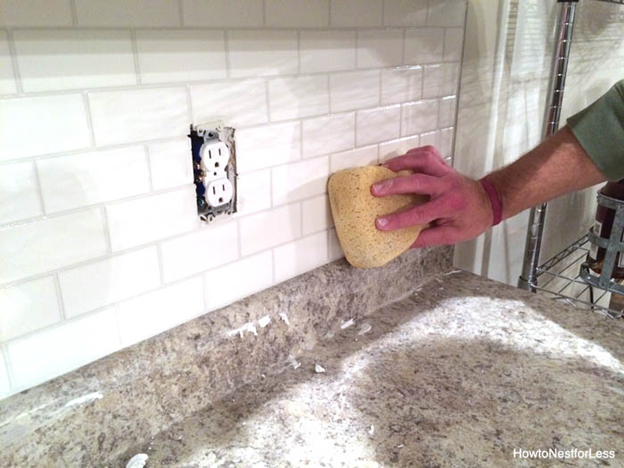
Now, you need to prepare the grout first. You can use either water or grout boost to prepare the grout. It would be better if you use grout boost instead of water because using it will free you from the pain of sealing your backslash every year. Allow the mixture to stand for 10-15 minutes and then re-mix it so that it does not get dry. Use the grout float to apply the mixture at an angle of 45 degree. Wipe off the grout periodically with a sponge and then allow it to dry. Wipe again with little amount of watered sponge to remove the mist, if any. Wait for 24 hours and then you can fir your electric covers back onto their place.
After this final step, wipe the tiles with a wet sponge to remove the extra grout.
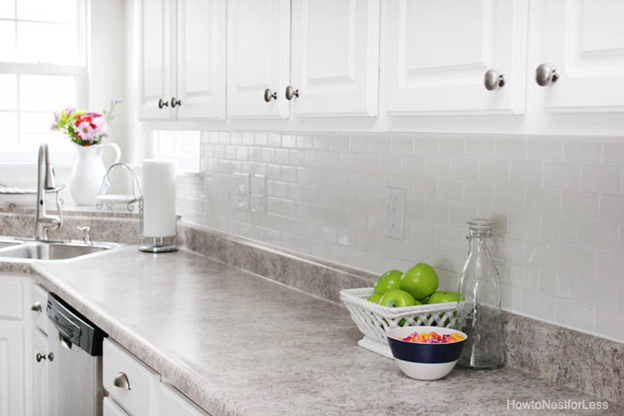
Look in your kitchen……isn’t it looking amazing!!
To make your installation even easy and steps more clear, following is the video for the process.
Video Source: The Craftsman Blog
All Images Source: Howtonestforless
Author Bio:
Ryan Henderson is the owner of Henderstone LTD, a leading online retailer of quality quartz, granite worktop and other variants for homes and offices in South East. He is passionate about home improvement services and loves to write on related topics for his audience.

0 Comments.