


If you have a crowded accommodation and storage space is not enough, you need to generate more space using smart storage options. The latest wall shelving systems that allow you to go straight down with storage can be highly helpful in saving space. And if your choice of wall shelving system is unique and exceptional, it will help enhance the aesthetics of your home interiors too!
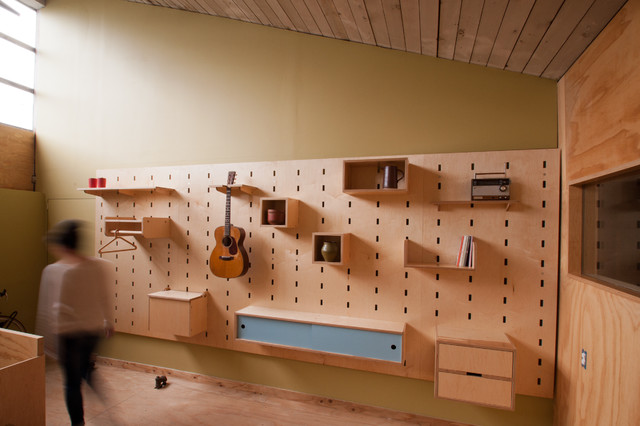 A modern pegboard shelving system is the best and most stylish as far as DIY wall shelving projects are concerned. It doesn’t require you to be too technical and takes minimal skills and efforts. Besides, the idea is smart enough to help utilize every inch of available space within your home, particularly in your narrow kitchen, that too without having to drill so many holes in your walls!
Making a Pegboard Shelving System
The real advantage is that a pegboard shelving system can be built using a bit of imagination and relatively less tools compared to most other shelving systems. The design is popular because it is simple, smart and attractive, and offers multiple options for configuration!
Materials Needed:
- Plywood or thick board of 3/4″ size, but make sure it doesn’t crack
- Dowels with a diameter of 3/4″
- Wooden boards that can be used as shelves
- Sandpaper
Important Tools:
- A power drill
- A saw to cut boards
- A spade bit of the same size as dowels
- Pencil and T-square
Building Pegboard Shelving System – Steps:
Step 1: The starting point remains to plot out systematic hole placement. Since you have taken both plywood and wooden boards for shelves of the standard size, measurements will need to be accordingly. You can seek help from an expert illustrator for proper and precise placement. And if you want to do it all by yourself, use a pencil and piece of paper.
Step 2: You can mark holes on your wooden panel using a pencil once you have successfully figured out the plan. At this point, you will find your T-square highly helpful. Make sure you have checked out all the measurements two or three times in order to ensure accuracy.
Step 3: Now, drill the first hole right at the first mark using your spade bit, but make sure you can hold the drill properly straight and upright. If you are able to hold it steady, your dowels will be smooth in the end.
Step 4: Insert one of the dowels after creating the first hole and check if it fits fine. If you think the dowel is fitting properly, you can go ahead with drilling the remaining holes.
Step 5: Brush off the sawdust after drilling all the holes and flip over the panel. If you see splintering on the other side, don’t worry as it’s obvious. Break all big splinters so that your panel can lie level against the wall
Step 6: Once you’re done, flip the panel again and sand the main side. Clear all rough hole edges by sticking the sandpaper in them. Determine the length of dowels by measuring the shelf depth and adding it to the thickness of panels. Use your saw to cut dowels.
Step 7: Ultimately, it’s up to you how long you want your shelves to be. It may also depend upon how long shelves look good within your kitchen or other areas.

0 Comments.