


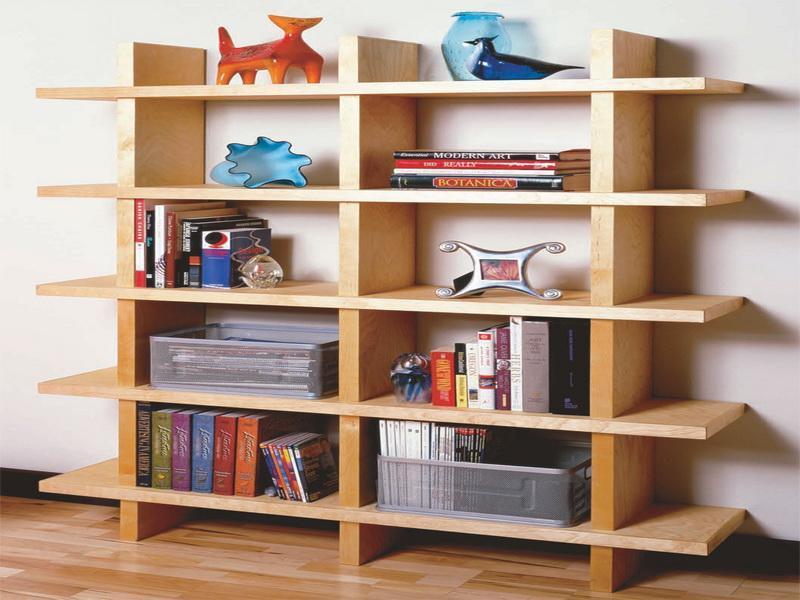
If you are too tired of sweeping your books and magazines everyday from your living room, you definitely need a customized book shelve to organize them more smartly. So, here we have a relatively easy step by step guide to build your own customized book shelf.
Things you will need:
- Plywood strips
- Circular and hand saw
- Drill
- Screwdriver
- Screws/Headless nails
- Clamps
- Measuring tape
- Paint
- Wood Adhesive
Determining Measurements
In accordance with the desired wall space and your book shelf requirements, sketch outlines on the plywood with a scale. There will be two parallel plywood strips that should be same in height to the wall. The remaining wooden strips will be the shelves between these parallel tracks.
 You will require a back portion, which will be equal to the area of the frame. For instance, let the parallel strips be 50 inches tall and 14 inches deep. Similarly, the required number of shelves will have a width of 14 inches, but the length can be altered as per requirements, let’s say 30 inches.
Assembling the Frame
Now that you have the desired measurements for a book shelf, cut out pieces using a circular saw for the frame. The number of shelves your book rack needs can be decided after categorizing book section needed. Once you have all the required wooden strips for the book shelf, assemble them for an outer frame. Initiate the model with two parallel strips at two separate ends and glue the top and bottom with extreme ends of the parallel strips.
Add Figures to the Frame
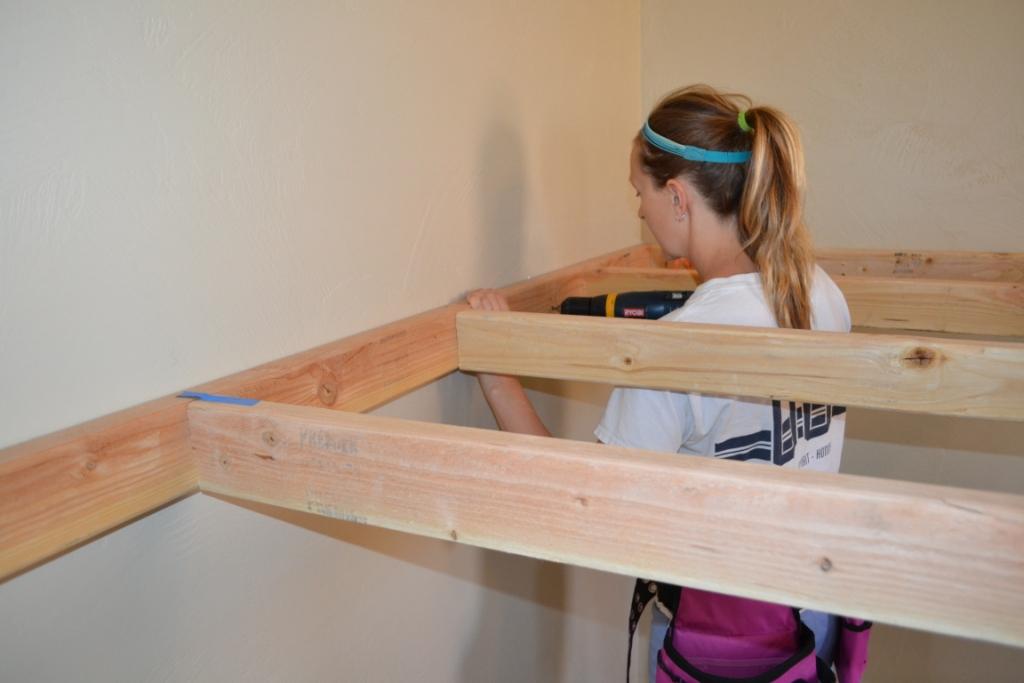 Once you have the outer frame ready, you need to mark its front and back. The back portion will be clamped to the wall and the front part will face the room. Turn the back portion upside and apply quick adhesive on the edges of the frame. Place the back wooden strip on the frame and fix it with headless nails. Turn around the frame and it will seem as if it is a big blank cabinet to you. Now place the shelves at a desired divided distance of the frame with glues at all three inner sides of the shelf strips. Because the shelves have length is similar to the distance between the parallel strips, they will fit perfectly in the frame. Let the wooden glue dry for a while and then fasten the shelves with nails or screws.
Attaching Frame to the Wall
In about an hour the wooden adhesive will dry up and the frame ready for mounting up the wall. Coat the wooden surface with paint or primmer for a durable life. Turn the frame upside down and fasten the clamps at the four extreme wooden ends of the parallel strips. Similarly, measure distance between the clamps and drill the screws on the preferred wall. Now, cart the wooden book shelf to the wall with clamps fixed to the drilled screws. Position it in symmetry and you will have your own custom bookshelf in no time.

0 Comments.