


Bought a new home theater, great! But, now you might be worried about its placement in your home. The first fight is for placing it in a bedroom or a living. Once you are final with the decision, next raises the question for keeping it an ideal place. You need to optimize the speakers’ positions for the best sound quality. But are they occupying great space and making your room more crowded? So, you need a perfect solution that supports your speakers and that too without affecting the sound quality. Here’s a solution, use speaker mounts and stands. Learn how to use them:
Step 1: Collect Materials and Tools
It is preferred to get ready with all the required stuff beforehand. Note down;
• A speaker cable
• Speaker mounts
• Mounting hardware (these are often included with mounts)
• A Stud finder
• A cordless drill (with a 1/4-inch or 5/16-inch drill bit)
• A screwdriver or power bit
• Combination wire stripper and cutter
Step 2: Select the Mounts
The selection of speaker mounts will depend on the type of speakers you purchased. So, if you have a 5.1 or 7.1 home theater sound setup, you can go for small wall mounts. Similarly, if you have satellite speakers which are small and light weighted, you can move to less heavy duty brackets or mounting solutions.
Step 3: Find an Ideal Location
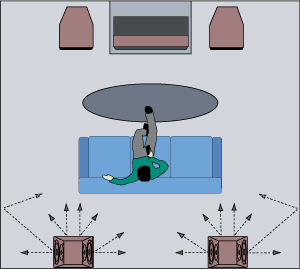
It is undoubtedly one of the important steps and need great care as once you start making holes in the wall, there is no turning back. Thus, you need to plan your speaker’s placement carefully. The speakers should be spaced evenly apart, with your television and seating area in the center. Keep the speakers one to two feet away from the corners at least. Also, make sure you leave some space for the speaker cables.
Step 4: Mount the Brackets
Now it’s time to mount your speakers! You will need a stud finder for drywall and even for other hollow wall panels. The stud finder helps you determine that whether there are any electrical conduits, pipes, or other hazards back over there or not.
Now, you can use a speaker mount templates for marking the locations for holes. Use a template made out of cardboard when mounting more than two speakers.
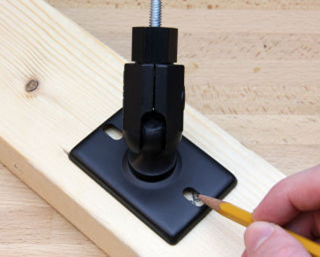
With a drill machine, drill a 5/16-inch hole in the drywall. Second option is to drill a1/4-inch x 2-inch-long hole into a solid wood stud. And if you are drilling into masonry, a hammer drill and 1/4-inch masonry drill bit will be required.

When finished with drilling, clean the holes and insert the wall anchors ideally.
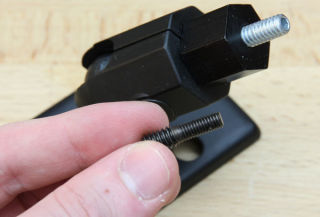
Step 5: Hang the Speakers
A threaded stud would be best option; the connection between the mounting bracket and the speaker becomes easier.
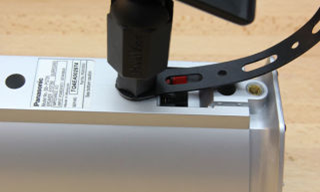
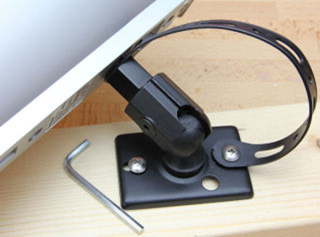
Just you need to insert the stud into the speaker mount and attach the speaker to the end of the threaded stud. Make it little tight and fit the speaker wires to the backs. With speakers and threaded stud mounts into a position against the bracket, you can adjust the angle of each speaker.
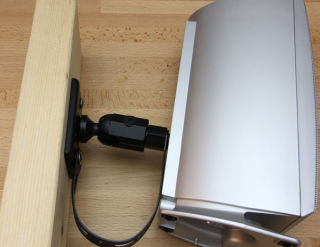
Once you are done with this, attach the cables and enjoy the music!
Author Bio:
Richard Bach is the E-Commerce Manager of Cotytech, a company which deals with designing and manufacturing of flat screen mounting solutions like TV wall mount, car mounts, etc. He frequently writes on various technology products, sharing his views on the products that brings forth a better vision.

0 Comments.